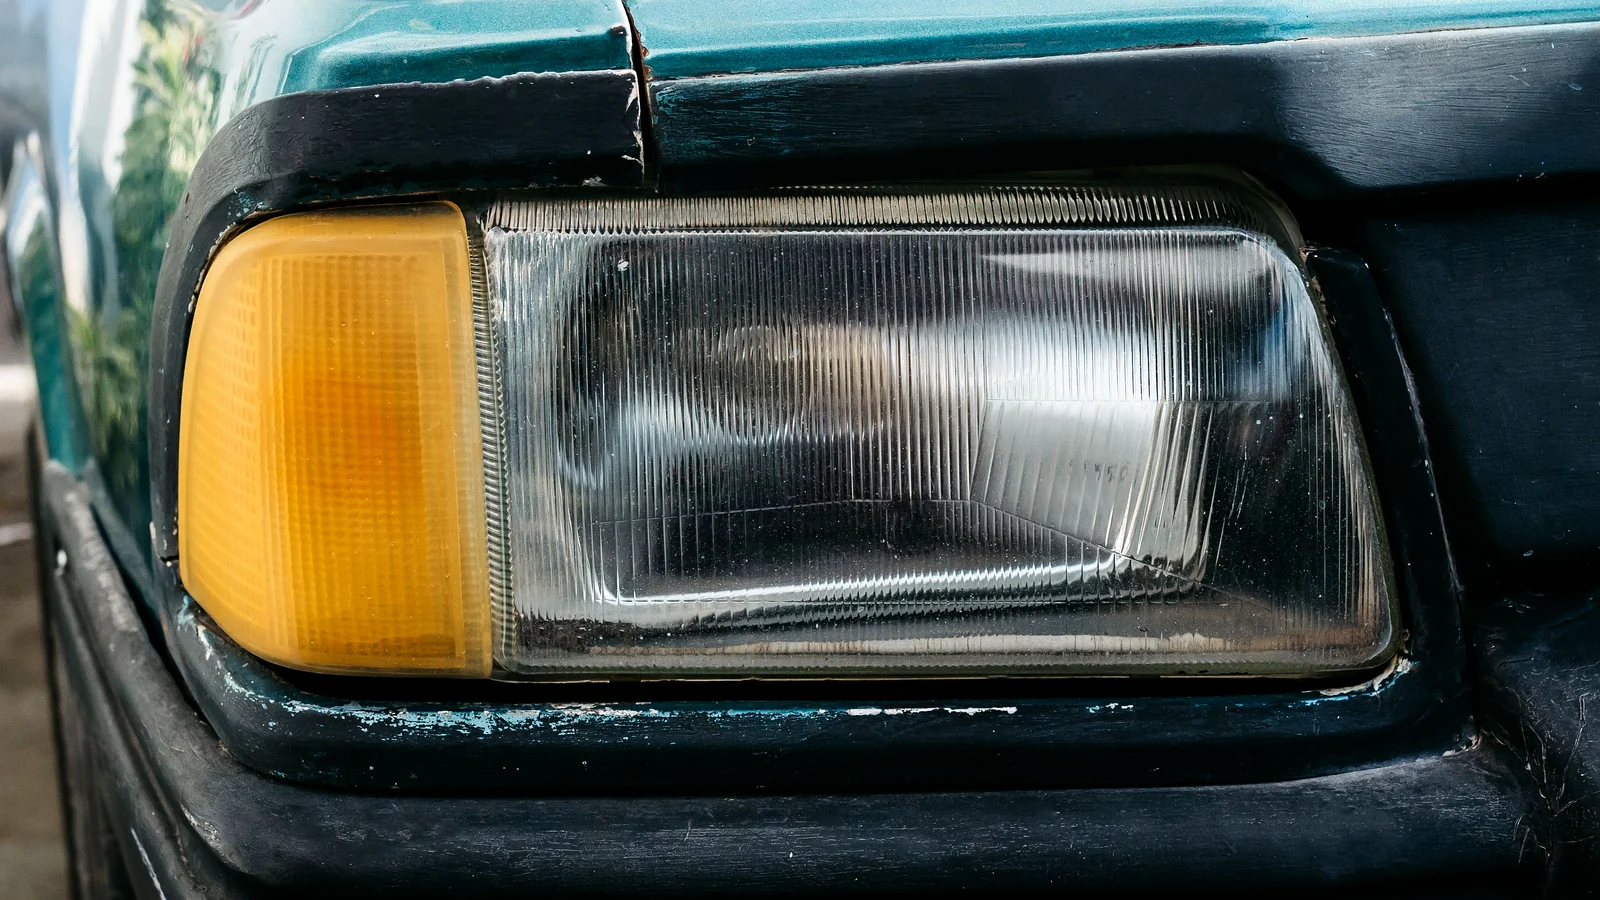

Quick Answer: To fix cloudy headlights, wet sand the lens with progressively finer sandpaper, polish it clear, then seal it with a UV protective coating. A restoration kit makes this easy. The UV step matters most: without it, lenses often haze again within a year. If the lens is cracked, damaged inside or has been restored several times, replacement is the better fix.
Key Takeaways
- In AAA testing, cloudy headlights produced only 20% of the light of new ones on low beam.
- The haze comes from sun damage to the lens’s protective coating, often visible within 3 to 5 years.
- Restoration brought light output back to roughly 70% of new in AAA’s tests; new original-equipment headlights restore 100%.
- Consumer Reports found many restored lenses started hazing again within a year, so a UV sealant is essential.
- Regular waxing or garage parking slows the yellowing.
Cloudy, yellow headlights make a car look older than it is, but the bigger problem is what they do at night. In a study by AAA, deteriorated headlights produced just 20% of the light that new ones did on low beam. That’s a real safety issue, especially since about half of all crashes happen after dark. The good news is that most cloudy headlights can be restored at home in under an hour for a modest cost. This guide explains how to clean cloudy headlights properly, what results to expect, and when replacing them makes more sense.
Table of Contents
Why Headlights Turn Cloudy and Yellow
Most modern headlight lenses are made of polycarbonate, a tough plastic that’s lighter and more impact-resistant than glass. To protect it, automakers apply a clear coating at the factory. According to AAA, sunlight gradually breaks that coating down, and once it’s worn, the plastic underneath starts to oxidize and discolor.
The result is the familiar foggy, yellowish look. AAA notes it can begin appearing in as little as three to five years, depending on where the car is driven and parked. Cars that live outdoors in hot, sunny climates usually fog faster than garaged cars.
It’s worth knowing which kind of haze you have:
- Outside haze: a rough, chalky or yellow surface you can feel with your fingertip. This is oxidation, and it can usually be restored.
- Inside haze or moisture: fog, droplets or discoloration inside the lens. Sanding the outside won’t fix this; it usually means a damaged seal or a failing headlight assembly.
How Much Light You Lose
AAA’s lab tests put real numbers on the problem and on each fix:
| Headlight condition | Light output vs. new headlights |
|---|---|
| Cloudy, deteriorated lens | about 20% |
| DIY restoration | about 70% |
| Professional restoration | about 70% |
| Aftermarket replacement headlight | 83% to 90% |
| New original-equipment (OEM) headlight | 100% |
Source: AAA headlight research, 2018 (low-beam testing).
Two things stand out. First, restoration is a big improvement over a cloudy lens, more than tripling the light in AAA’s tests. Second, restoration doesn’t make an old lens as good as new. AAA also found that restored lenses and aftermarket parts produced more glare than Department of Transportation criteria allow, so a new OEM headlight remains the best option if the budget allows.
How to Clean Cloudy Headlights: Step by Step
You can buy a restoration kit at most auto parts stores. Consumer Reports found effective kits for under $25 when it tested them. Follow your kit’s instructions, but the process generally looks like this.
What you’ll need:
- A headlight restoration kit (sanding pads in several grades, polishing compound and a UV sealant)
- Painter’s tape
- A spray bottle of water
- Microfiber towels
- Gloves and eye protection
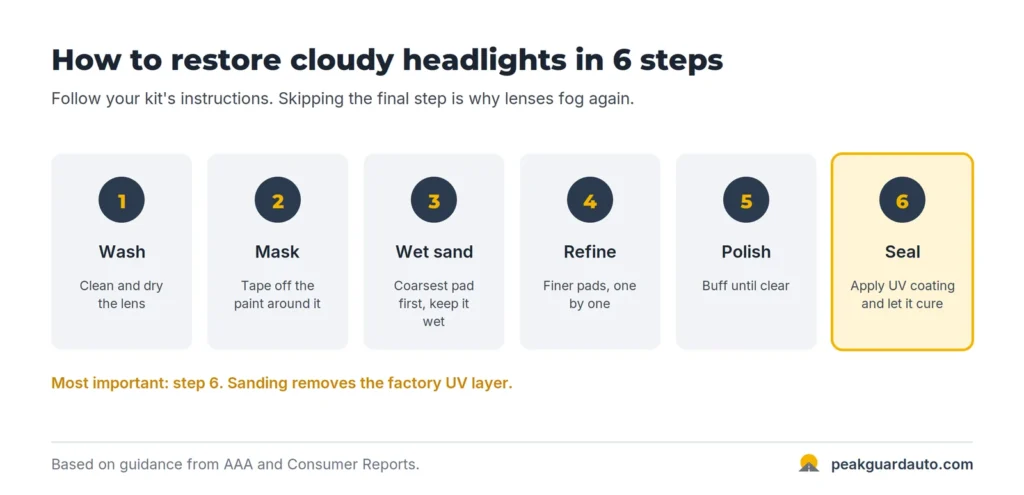
Step 1: Wash and dry the headlight
Clean the lens with soapy water or glass cleaner to remove dirt, bugs and road film. Consumer Reports recommends this first, because sometimes a dirty lens is the only problem and no sanding is needed. Dry it completely. If the whole car needs it, follow our step-by-step car wash guide.
Step 2: Mask the surrounding paint
Apply two layers of painter’s tape around the headlight’s edges. Sandpaper can scratch your car’s paint in seconds, so don’t skip this.
Step 3: Wet sand, starting coarse
Work in the shade on a cool lens. Spray the lens and the sanding pad with water, then sand with the coarsest pad in the kit using steady, overlapping strokes. Keep it wet. The lens will look worse, uniformly frosted, which is normal. The goal is to remove the damaged outer layer evenly.
Step 4: Move through finer grades
Rinse, then repeat with each finer pad in order. AAA describes the process as using “progressively finer grits of sandpaper” to remove the damaged material, then buffing to create a clear surface. Kits often move from a fairly coarse pad (for example, around 800 grit) to a very fine one (around 3,000 grit). Each finer pad removes the scratches left by the one before.
Step 5: Polish
Apply the polishing compound with a pad or microfiber towel (or a drill attachment if your kit includes one) until the lens turns clear. Wipe off the residue and inspect it in good light. If cloudy patches remain, go back one sanding grade and repeat.
Step 6: Apply the UV sealant
This is the step that decides how long your work lasts. Sanding removes what was left of the factory protective layer, leaving bare plastic exposed to the sun. AAA notes that better kits finish with a UV coating, and professional restorations apply and cure one. Apply it exactly as the kit directs, in a dust-free area, and let it cure for the full time listed before driving in rain or washing the car.
Step 7: Remove the tape and check the beams
Peel off the tape and turn on the headlights against a wall or garage door. You should see a brighter, cleaner beam pattern.
Do Toothpaste and Other Home Hacks Work?
You’ve probably seen videos of people cleaning headlights with toothpaste, baking soda or bug spray. Toothpaste and baking soda are mild abrasives, so they can make a lightly hazy lens look somewhat better for a while. They don’t remove deeper oxidation the way a proper sanding process does, and they leave no UV protection behind, so the haze tends to return quickly. Solvent-based hacks like bug spray aren’t designed for headlight plastic and can risk damaging the lens. If your lenses are noticeably yellow or rough, a proper restoration kit is a better use of an hour.
How Long Does Headlight Restoration Last?
Not forever. Consumer Reports found that many lenses it restored had begun hazing again within a year, and body shops told it many customers refinish their headlights annually. The difference usually comes down to UV protection: a restoration finished with a quality UV sealant lasts noticeably longer than one that’s only polished.
To keep lenses clear longer, AAA recommends:
- Waxing your headlights two to four times a year, at the same time you wax the car
- Parking in a garage or shade when you can
Restore or Replace? How to Decide
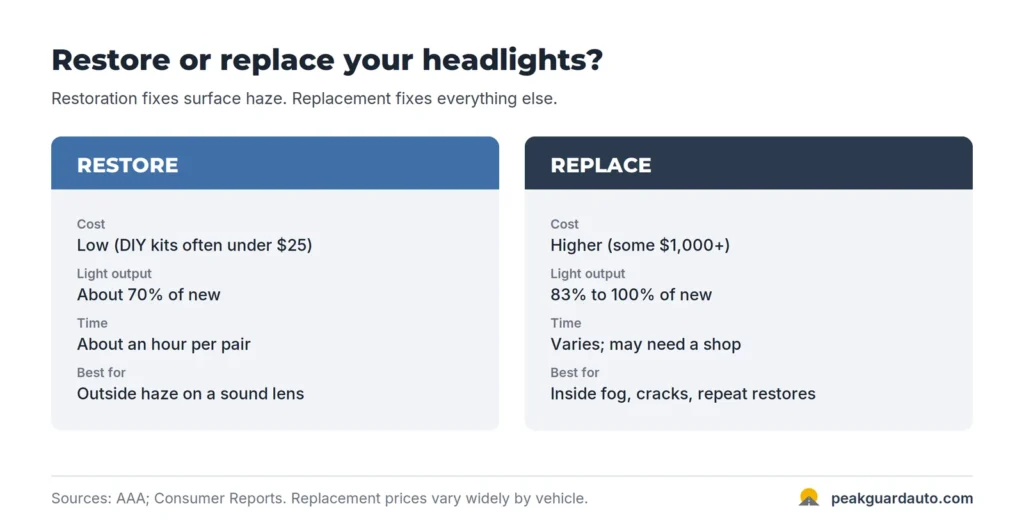
| Restore | Replace | |
|---|---|---|
| Typical cost | Low; DIY kits often under $25 | Higher; AAA notes some headlight assemblies cost $1,000 or more |
| Light output (AAA tests) | About 70% of new | 83% to 90% (aftermarket), 100% (OEM) |
| Time | About an hour per pair (DIY) | Depends on the vehicle; may need a shop |
| Best for | Surface haze on an otherwise sound lens | Inside fog or moisture, cracks, or lenses already restored several times |
Sources: AAA; Consumer Reports. Replacement prices vary widely by vehicle.
AAA says replacement becomes the right call when the lens is severely deteriorated or has been restored multiple times, because at that point “the material is simply breaking down from age and UV exposure.” A cracked lens or moisture inside the housing also points to replacement.
When to See a Professional
Consider a professional detailer or shop if:
- You’re not comfortable sanding near your car’s paint
- The haze is inside the lens, or you see moisture or condensation
- The lens is cracked or chipped
- Your car has expensive LED or adaptive headlights, where a mistake would be costly
- The headlights are still dim after restoring them, which could mean aging bulbs, a wiring problem or misaimed lights
Also check the bulbs. Consumer Reports notes that if your lenses are clear but the lights still seem dim, the bulbs may need replacing. If you’re working through other upkeep, our guide to the real cost of owning a car covers how maintenance fits into your yearly budget.
Frequently Asked Questions
Why are my headlights cloudy?
Most headlight lenses are polycarbonate plastic with a factory protective coating. Sunlight breaks the coating down over time, and the exposed plastic oxidizes and turns hazy or yellow, sometimes within three to five years.
How much light do cloudy headlights lose?
In AAA’s testing, deteriorated headlights produced only about 20% of the light of new ones on low beam. That significantly reduces how far you can see at night.
Does toothpaste really clean headlights?
It can slightly improve lightly hazy lenses because it’s a mild abrasive, but it doesn’t remove deeper oxidation or add UV protection, so the haze usually comes back quickly. A restoration kit with a UV sealant works better.
How long does headlight restoration last?
It varies. Consumer Reports found many restored lenses began hazing again within a year. Finishing with a UV sealant and waxing the lenses a few times a year helps the results last longer.
Is it better to restore or replace headlights?
Restoration is the cheapest fix and works well for surface haze, bringing light output to about 70% of new in AAA’s tests. Replacement is better if the lens is cracked, fogged inside or has already been restored several times.
Can cloudy headlights fail a vehicle inspection?
In states that inspect vehicles, headlights generally need to work properly and be aimed correctly, and inspectors may flag lenses that are badly damaged. Rules vary by state, so check your state’s inspection requirements.
How can I stop my headlights from turning yellow?
Apply a UV protective coating after any restoration, wax the lenses two to four times a year, and park in a garage or shade when possible to limit sun exposure.
Conclusion
Cloudy headlights are more than a cosmetic issue. They can cut your light output dramatically and make night driving harder. For most cars, an inexpensive restoration kit and an hour of careful work will bring back much of the brightness, as long as you finish with a UV sealant and keep the lenses waxed. If the lenses are cracked, fogged inside or worn out from repeated restorations, replacing them is the safer long-term choice.
PeakGuard Auto provides general informational guidance only. Results vary by vehicle, lens condition and product. Always follow the product manufacturer’s instructions, and consult a qualified professional if you’re unsure.
Sources
- AAA (December 2018): headlight deterioration research, light output of restored and replaced headlights. https://newsroom.aaa.com/2018/12/dangers-driving-cloudy-headlights
- AAA Mountain West Group (October 2022): headlight restoration process, replacement costs and prevention. https://mwg.aaa.com/via/car/headlight-restoration-replacement
- Consumer Reports (December 2018): restoration kit testing and durability of results. https://www.consumerreports.org/car-repair-maintenance/old-headlights-can-be-dangerously-dim/